CodeBox integration
Overview
Using a smart lockbox is the safest way to do self-showings. It allows generating a specific code for each tour, which is valid for only a short period, so that codes cannot be reused. CodeBox is the easiest smart device to integrate with Showdigs, and can can be used for agent showings as well.
How do I set it up?
To connect your CodeBox account with Showdigs, an account owner should follow these steps:
Log into Showdigs.
Click on your name at the top right, and select Settings.
Click Integrations.
Locate the 'Codebox Integration' setting and toggle it 'ON'.
Input your CodeBox login credentials.
Once you have entered your credentials, click on the Update Information button to save your changes.
After successfully integrating your CodeBox account, you will be able to activate self-showings for your properties.
Are there any charges associated with these devices?
No, not through Showdigs. Any CodeBox related charges will come directly from CodeBox.
What does a self-showing look like for a prospect?
Before the tour
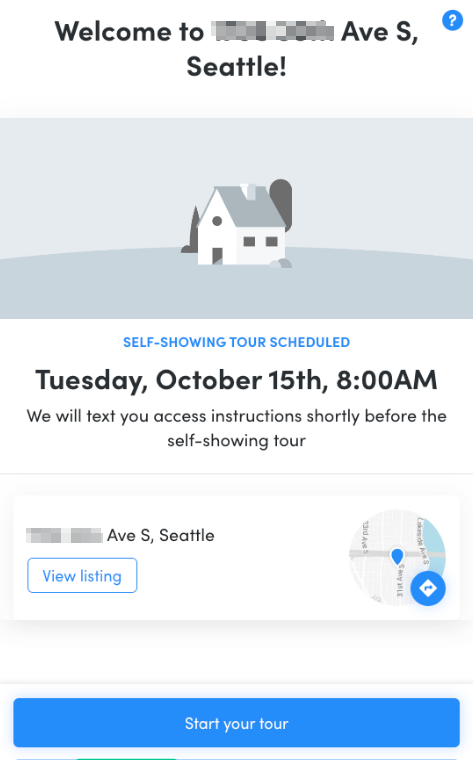
As the scheduled tour time approaches, prospects will receive an SMS reminder and then a notification that they can enter the property. This notification will include a link to the Showdigs webpage, which will guide them through their tour.
During the tour
Upon arrival at the property, prospects will be prompted to click on a "Start Tour" button.
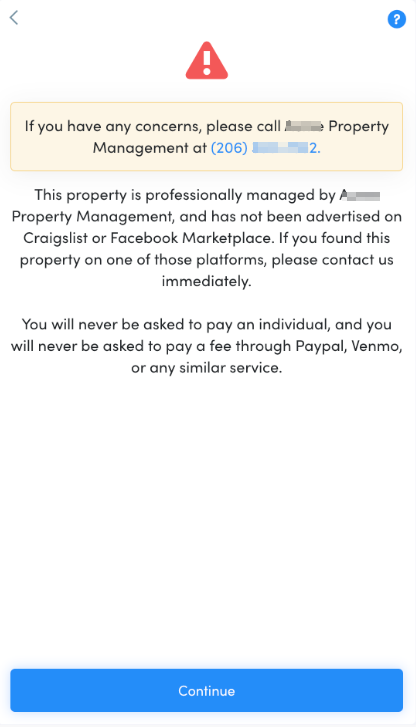
Prospects will first encounter a scam warning that confirms you are the property manager. This warning will include your contact information and a message clarifying that they will not be asked to pay an individual or send fees through services such as PayPal, Venmo, or any similar platforms.
Next, prospects will be directed to a page where they must enter the serial number from the physical lockbox device. Additionally, their GPS location will be checked. These measures are in place to ensure that they are physically present at the property and ready to commence their tour.
Once verified, prospects will receive the lockbox code, along with instructions on how to open the lockbox.
After the tour
After the tour, we will send follow-up SMS notifications that will include:
Instructions on how to securely lock up the property.
A request for the prospect to complete a tour report.
A link to the application form.
FAQs
Can I configure self-showings and agent showings for the same property?
It is important to note that our policy does not allow for both live tours and self-showing tours to be active simultaneously. If a property is activated as a self-showing property, prospects will only have the ability to schedule self-showing "in-person" tours.
How do I fix an "Entry Error" message?
If you enter a code into the CodeBox lockbox and the display reads "Entry Error," it indicates that one of two issues has occurred:
The date or time set on the CodeBox is incorrect.
The code you attempted to use was generated for a different day.
The one-time use CodeBox code is valid only for the specific date for which it was generated. For example, if you set an appointment or generate a code for September 17th and attempt to gain access on September 18th, the code will not work, resulting in the "Entry Error" message.
Similarly, if you have generated a code for a specific date but the CodeBox itself is set to an entirely incorrect date, you will encounter the same error. It is crucial to ensure that the CodeBox is configured with the correct date and time to facilitate all scheduled tours without issues.
To modify the date and time settings on a CodeBox lockbox, please refer to the steps below.
How do I configure the actual lockbox settings?
Setting the date, time, illumination, and DST
To begin, you will need your 6-digit admin/agent code. Enter the code followed by pressing the ENTER key. Once you have entered the code, the current time setting will scroll across the screen.
Wait for approximately 5 seconds until the display shows Select CMD: at the top.
Press the [1] button to update the date. You can enter the date in the format MM/DD/YY.
After entering the date, press the [Enter] button to proceed to the time settings.
Enter the hour and minutes for the current time. To change between AM and PM, press the [3] button.
Next, you will be prompted to enter the hour for which you would like the keypad to be illuminated for showings after dark. Illuminating the keypad will consume battery life. If you prefer not to have the keypad illuminated, set the time to 00A.
After completing the time entry, press the [Enter] button to move to the Daylight Savings Time (DST) option.
The DST option should be set to 1 or on. It is important to note that the box is programmed to adjust for DST within a week timeframe, rather than on the exact day, due to the varying dates of DST changes each year.
Once you have confirmed that the setting is in the 1 or on position, press [Enter] to proceed to the Agent Code option.
Updating the access window
Follow the instructions above, then press the [6] button.
Enter the time that showings are allowed to start, followed by the hour that showings are no longer permitted (for example, ST: 08A ED: 09P).
Additional information
Whenever you are at a display screen that says SELECT CMD, pressing 0 will return you to a blank screen.
If you are in a field that changes numbers, pressing 0 will insert a 0 into that field. Please exercise caution when attempting to exit, as this could inadvertently change the information.


